Create and edit a OneLink
Set up your page, update links, and publish.
Creating a OneLink is straightforward, but the best pages are intentional. Start with a clear goal, build the page around that goal, then keep it updated as campaigns or priorities change.
Recommended setup flow
- Create an account and sign in.
- Open your OneLinks dashboard at OneLinks.
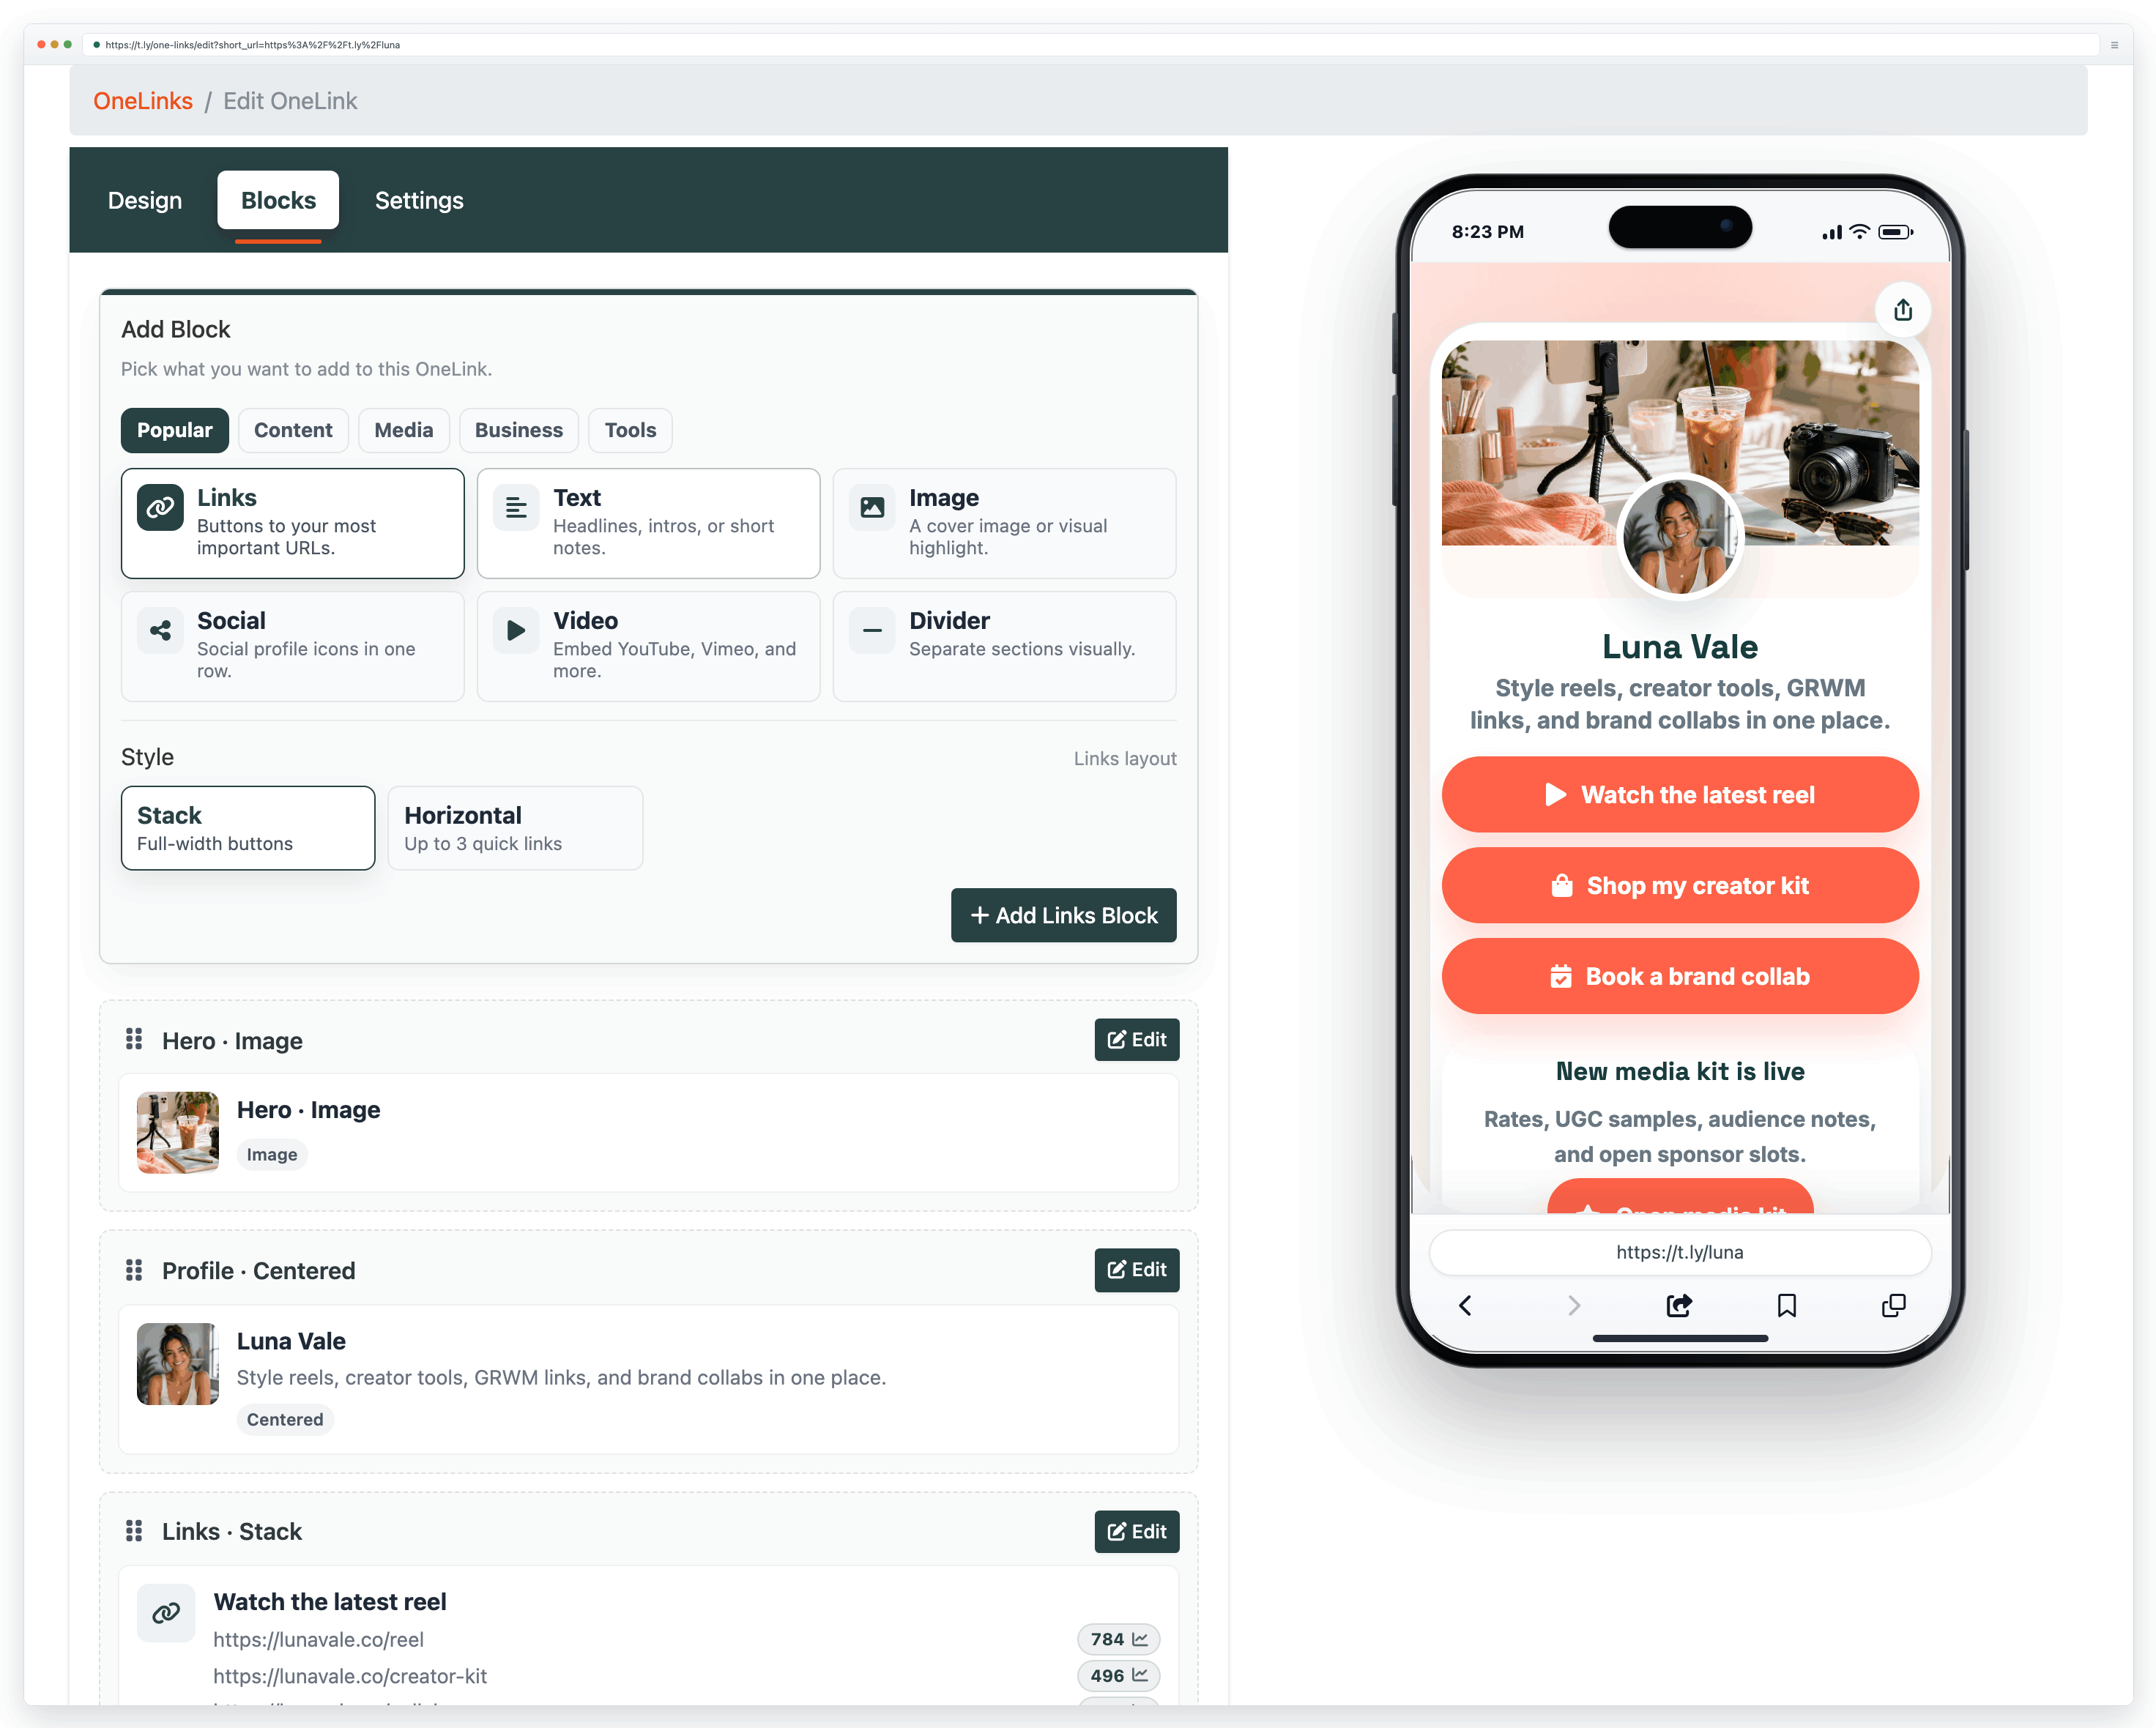
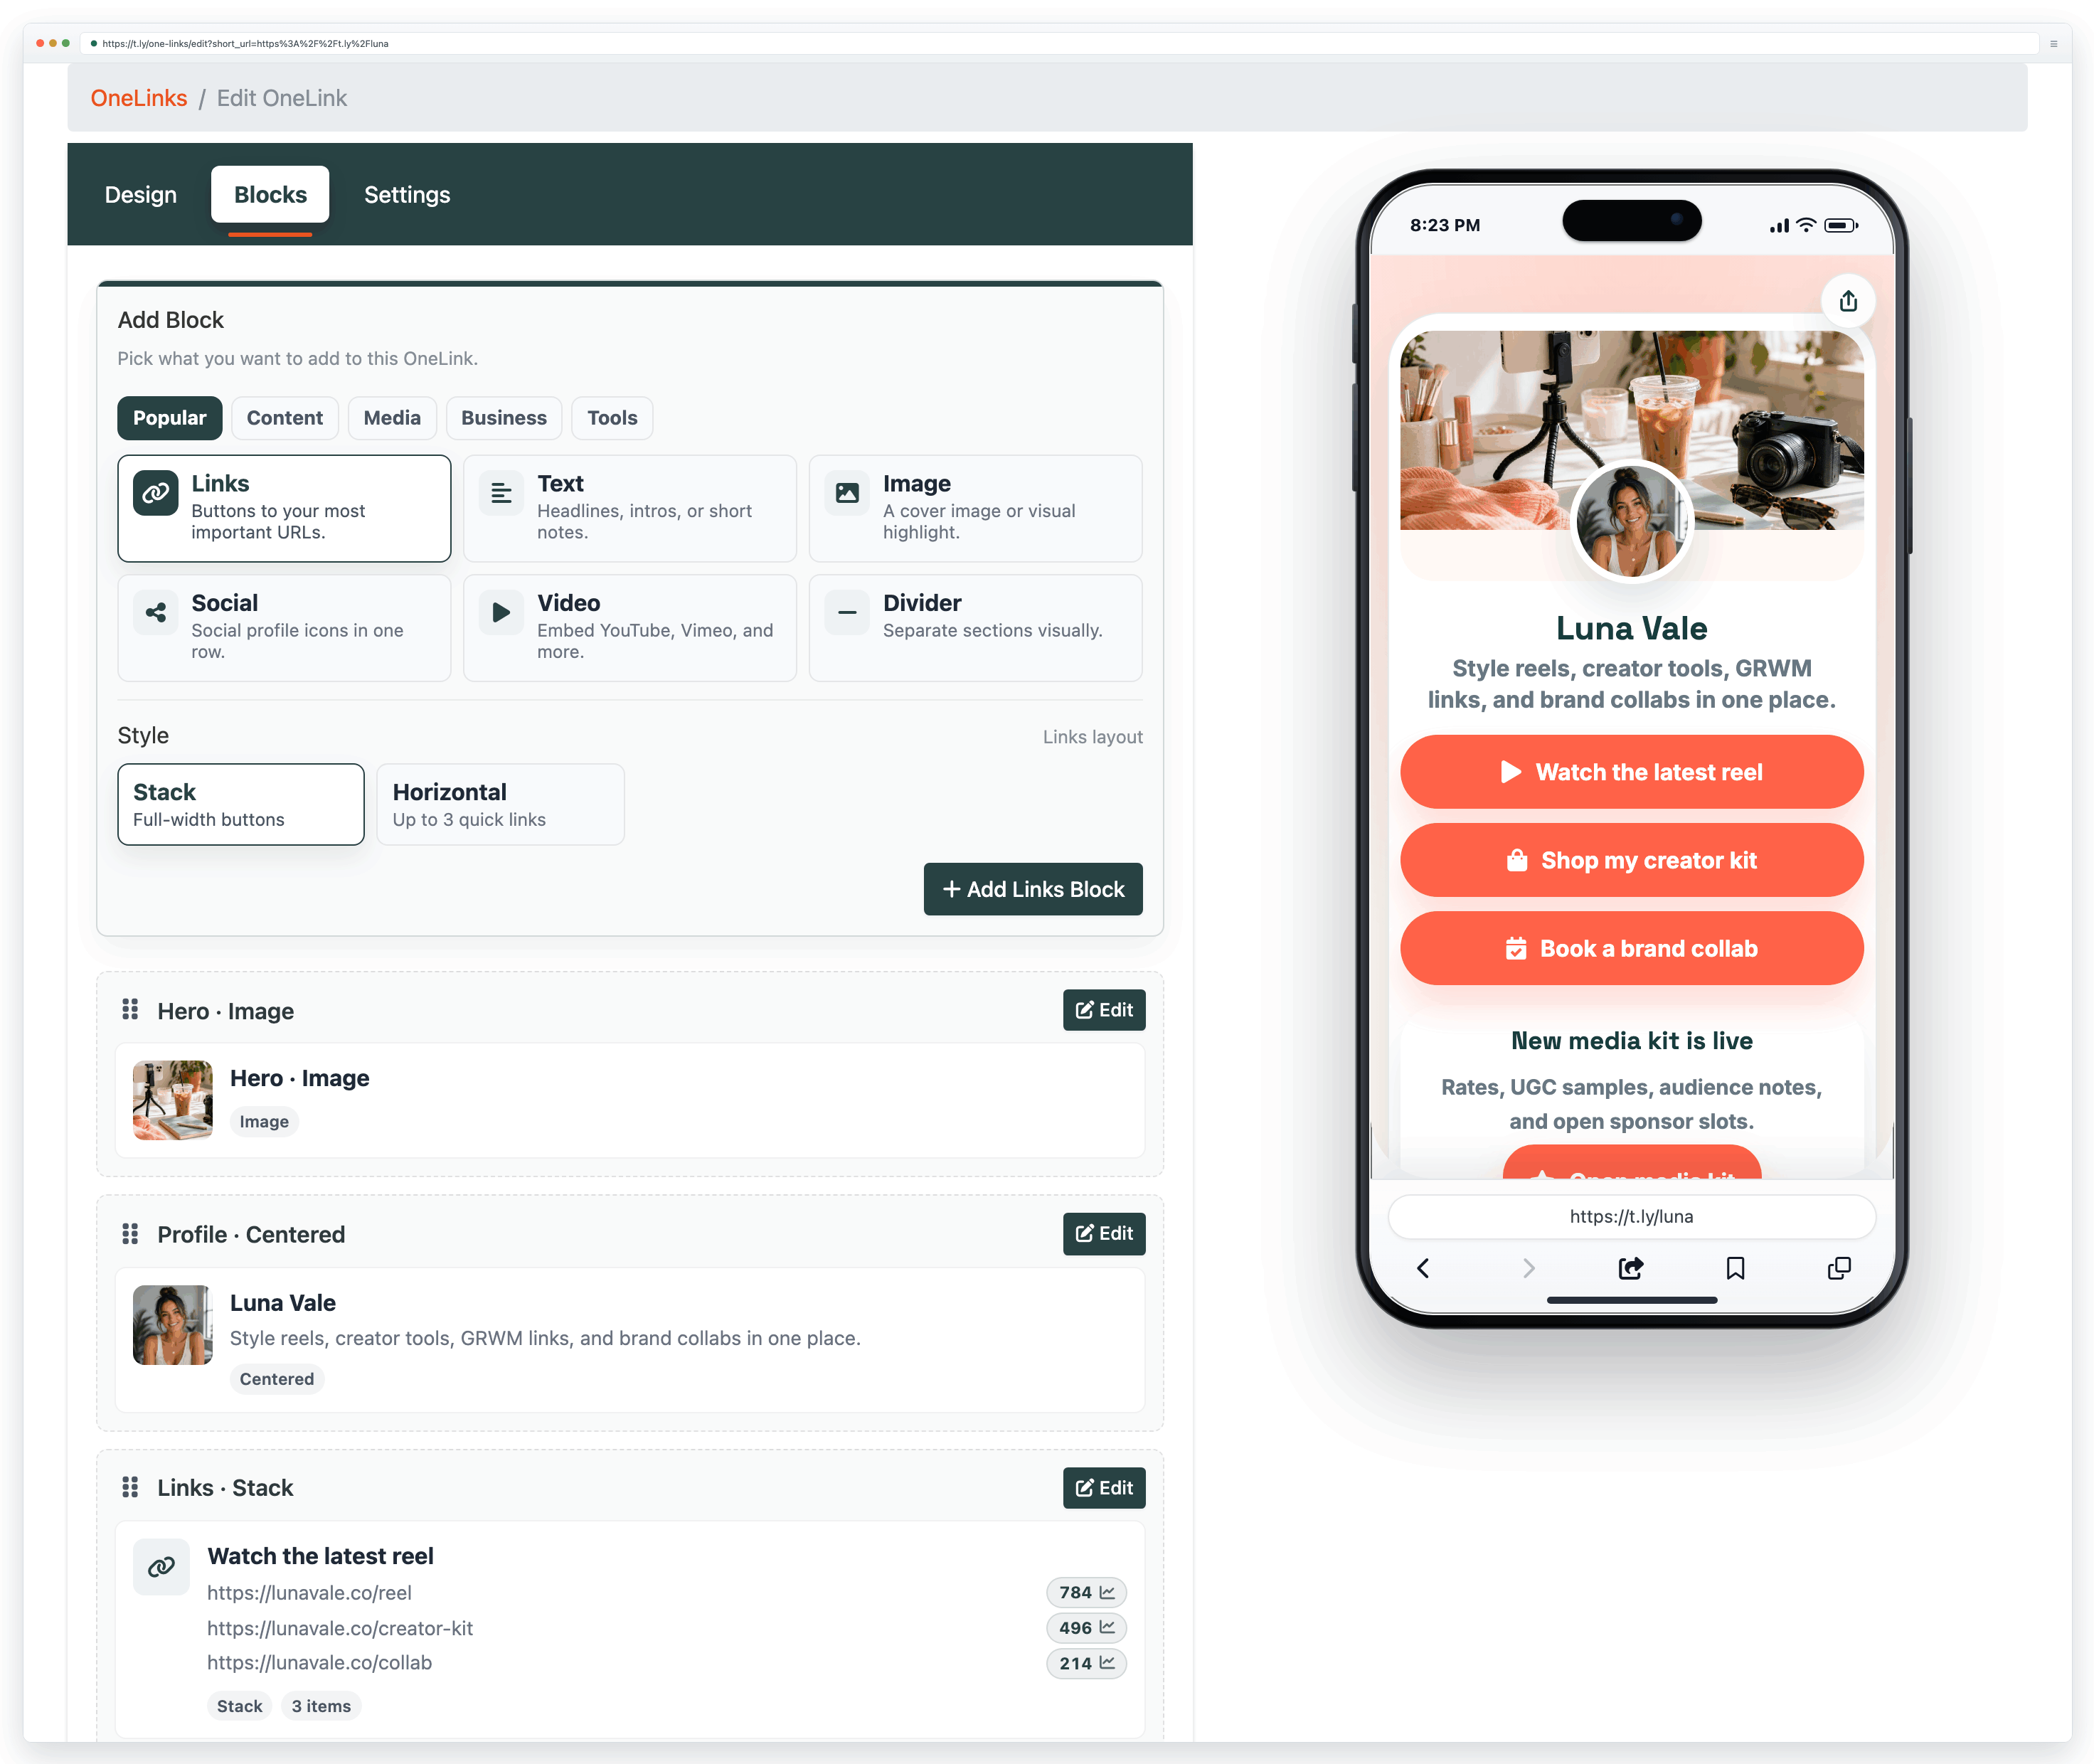
- Create a new page and choose the template or layout that best fits the use case.
- Add your title, short description, avatar or logo, and the buttons you want people to tap.
- Order the buttons so the most important action appears first.
- Preview on mobile before publishing, then share the OneLink URL anywhere you need one hub page.
What to add first
- Identity: page title, short description, and a recognizable profile image or logo.
- Primary action: booking, shop, subscribe, menu, contact, or whatever matters most right now.
- Supporting links: only add the destinations that truly help visitors decide what to do next.
Editing safely after launch
- Update links when offers change so your bio stays accurate.
- Remove outdated links to keep the page focused.
- When changing the order, remember that top buttons usually get the most taps.
- If a OneLink is already printed in QR materials, test the updated page after every major edit.
Related guides
Need more help?
If you still have questions, contact [email protected] or use the contact form. For abuse or suspicious links, use Report Abuse. For feature requests, email [email protected].


